Map Pack 4.0 Community Updates
Map Pack database is seamlessly intregated to the online version. Map Pack db exports appear in real time on Istaria Map page.
POST A COMMENT / SUGGESTION FOR MAPPACK UPDATE
LATEST NEWS:
| August 18, 2013 | Due to the integration of new functions to scripts and compatibility needed for future scripts, Map Pack 3.5 is now discontinued!
August 9, 2013 (08.9.2013) is the FINAL version of Map Pack 3.5. 3.5 users are strongly encouraged to upgrade to Updates (after August 9, 2013) will not be available in 3.5 format! |
| August 20, 2013 | Terao @ Order is now a database administrator. His expertise on map pack is invaluable. Future updates will now be a collaboration, so expect some new exciting updates. There has been many revamps to the backend scripts to allow maintaining the database by multiple individuals, with flexible searching/editing methods. This will also contribute to redundancy for future updates as well a broader array of input. Stay tuned for more... |
| September 5, 2013 | MAP PACK 3.7 IS RELEASED! Since Terao and I have overhauled 3.6 entirely, we decided to push the version up to 3.7.
But don't worry, we made sure it will integrate seamlessly with 3.6. So if you are already using 3.6, you do NOT have to uninstall 3.6. Updating will still be the same procedures as 3.6. That aspect has not changed. So think of 3.7 as 3.6, but improved! If you are currently a 3.6 user, simply download 3.7 and unzip/overwrite to your Istaria folder (as usual), to upgrade. |
| May 7, 2014 | MAP PACK 3.7 is now available in an EXE/MSI installer program! Foolproof installation and uninstallation (uninstall from Control Panel).
Note this page has now been streamlined to show only important info and geared towards the installer program. Much of the content has been removed to avoid confusion. A copy of the old map pack page can be viewed here: mappack_old.asp |
| February 10, 2015 | Version numbers are now using a new format!
Please be aware that the version numbers will start using the format: yy.mm.dd . Previously the format was: mm.dd.yyyy |
| August 19, 2021 | MAP PACK 4.0 IS RELEASED!
The vanilla install map has many new features & client fixes. It has come a long way and no longer quite so boring. These features & fixes will be available on the latest Delta 312 which has been recently released. Previous map packs attempted to override the old boring map window, in addition to providing markers. Map Pack 4.0 attempts to integrate and use most of the vanilla install new rich features instead of overriding many things. It will rely on and use much more data from vanilla maps, as much as possible. Version numbers are now displayed on the actual map window! |
| Last Map Pack Update: February 2, 2024 |
| CONTENTS: |
| Map Pack Overview |
| Install Instructions |
| Download |
| Updates History |
|
||||
|
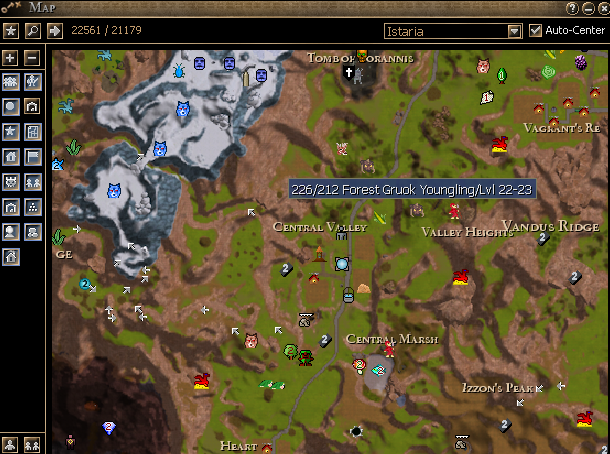
Map pack behaves exactly like the normal game map. The only thing map pack does is add extra buttons (filters) and adds predefined markers/locations on your map. These 'predefined' locations are simply a compilation gathered by players. The different buttons allows you to hide/show certain categories (resources, monsters, etc) of these predefined markers. Map pack does NOT intefere with your ability to manually add and maintain your own markers/locations. When you add markers Whenever you save a location/marker on the map, it saves it to \Prefs\<CHARACTER_NAME>\Uimapmarkers.def file. All map pack markers/locations are stored in the \Resources_Override folder, which is created when you install map pack. So any markers you manually add does not conflict with map pack, and map pack does not conflict with any markers you manually add. Tip: If you are adding alot of your own markers/locations, keep this file archived (uimapmarkers.def), in case you ever need to reinstall the game. By putting this file back, all of your locations you added, will return. Actually a better suggestion would be just to archive the entire C:\<Your Game Folder>\Prefs folder. This includes the map markers you added, and all of the hotkeys, key bindings, chat settings, that you have updated previously. If you ever need to reinstall the game, then just unzip the contents of the \Prefs folder back into a new install of the game, and everything should be just the way you left it :) Ok, now that we've covered the fact that map pack doesn't overwrite/modify/remove, nor interfere in any way with markers you manually add and already have on your list. Let's move on...
|
||
Top of Page
|
First Time Installation (using Installer program):
Updating/Patching new versions (you've used the Installer program before):
Uninstalling or Repairing:
No offense, but I do not trust .EXE Installer Programs from Unknown Publishers:
I'm trying to install Map Pack on a 2nd game folder, but the installer won't let me!
Can I change my avatar indicator back to the green dragon marker? Yes!
If you want to change the standard map indicator use the windows explorer and open the folder:

 ...\Istaria\resources_override\resources\interface\themes\default\textures


 Rename the file:
   map_indicator_direction.png
     to
   map_indicator_direction4.png (renaming to direction4 is to simply make a backup of the default indicator)

 Now rename one of the 3 indicator files:
   map_indicator_direction1,2 or 3.png
     to
   map_indicator_direction.png

 Default map indicator is a white dot with circle and arrow
 map_indicator_direction1.png is a green dragon with arrow
 map_indicator_direction2.png is a violet dragon
 map_indicator_direction3.png is a white dot with arrow
|
||||||||||||


|
||||||||||||||||||||||

Top of Page
UPDATES HISTORY:
|
||||||||||||||||||||||||||||||||||||||||||||||||||||||||||||||||||||||||||||||||||||||||||||||||||||||||||||||||||||||||||||||||||||||||||||||||||||||||||||||||||||||||||||||||||||||||||||||||||||||||||||||
Top of Page